很不幸,此页面的内容目前无法使用所选语言。
How to Change Apple ID Password
Apple devices are famous for their infrastructure and convenience of usage. Apple is pushing hard towards a seamless experience. And this next-level comfort across multiple devices is based on the single Apple account that allows you to log in to all your devices: iPhone, iPad, Mac, etc. To protect your privacy and sensitive data it is necessary to change passwords to prevent security breaches. In this article, we will answer how to change the Apple ID password in two clicks.
- How to change your Apple ID password on your iPhone?
- How to reset your Apple ID password on Mac?
- What occurs when you change the Apple ID password?
We are going to cover all these topics and provide you with up-to-date information. Let’s go!
How to change your Apple ID password on your iPhone
In this guide, we will teach you how to change your Apple ID password step by step.
1. Open your phone, go to Settings and click on your Apple ID name.
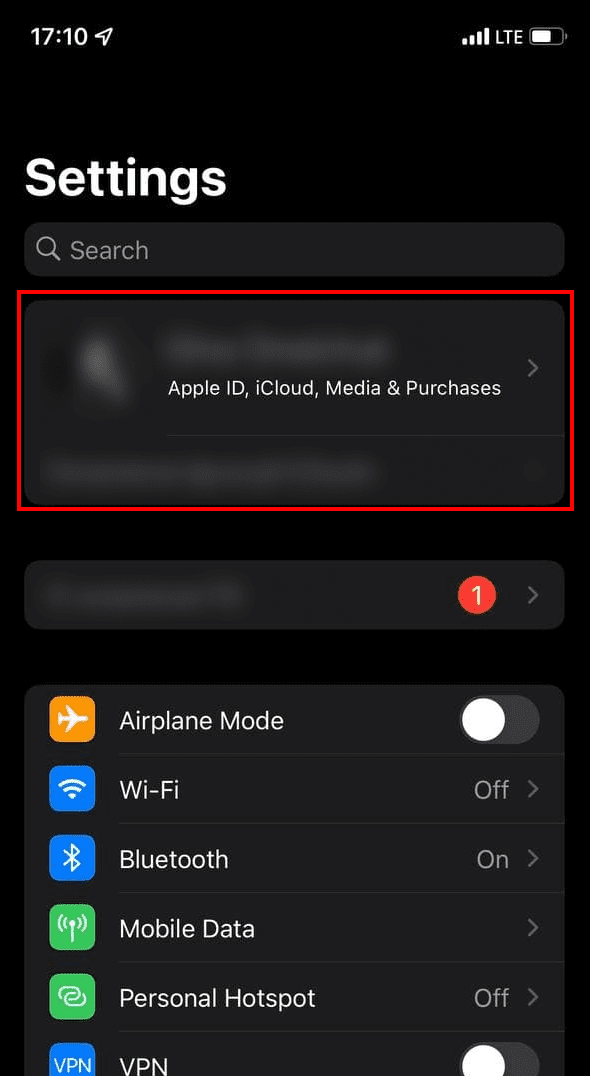
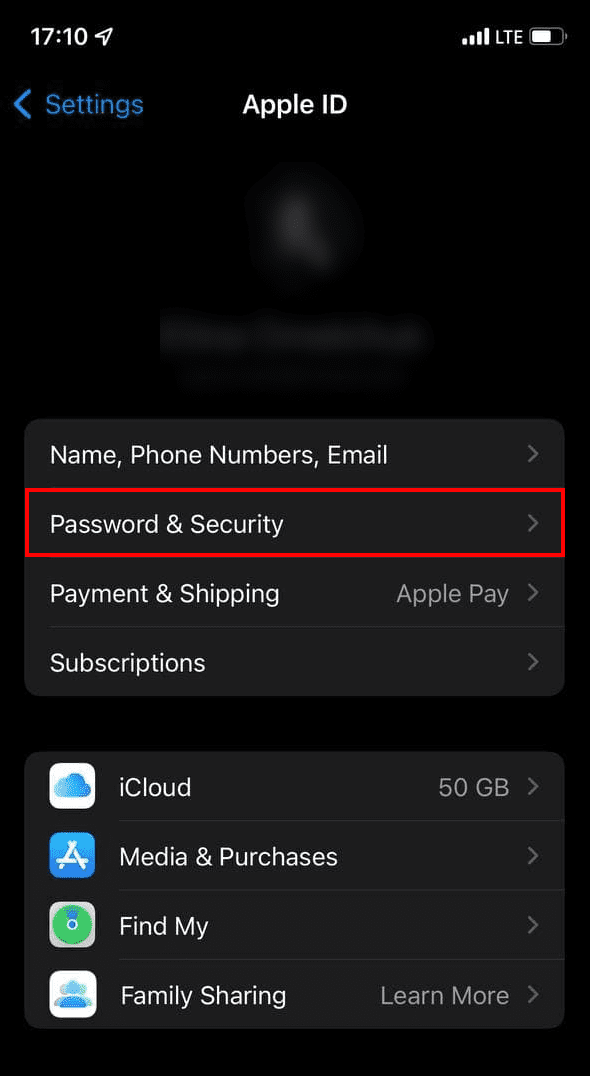
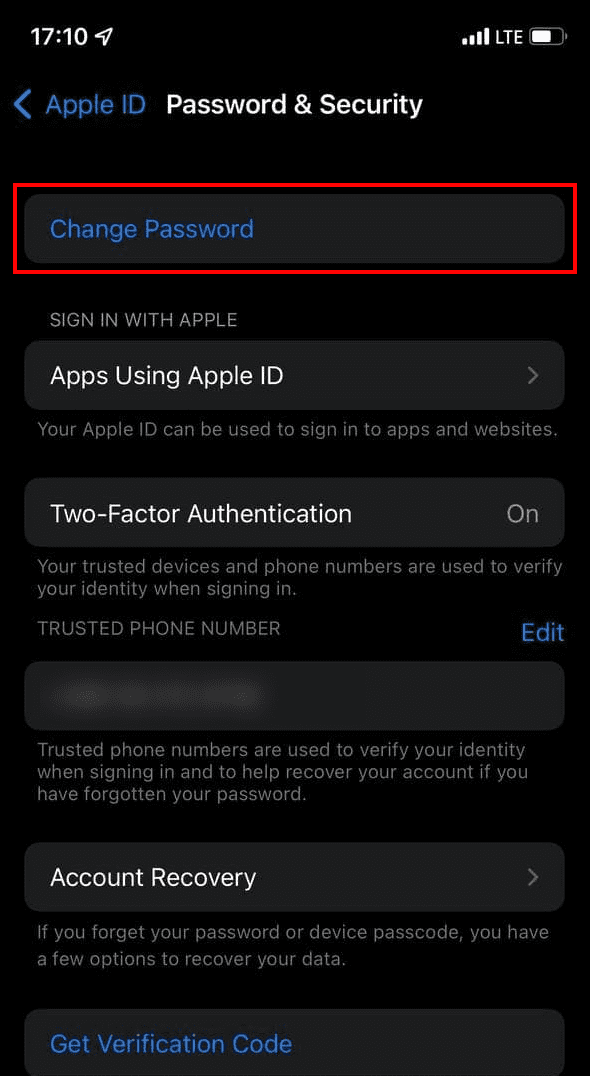
2. In your ID screen, go to Password and Security. Then click on Change Password.
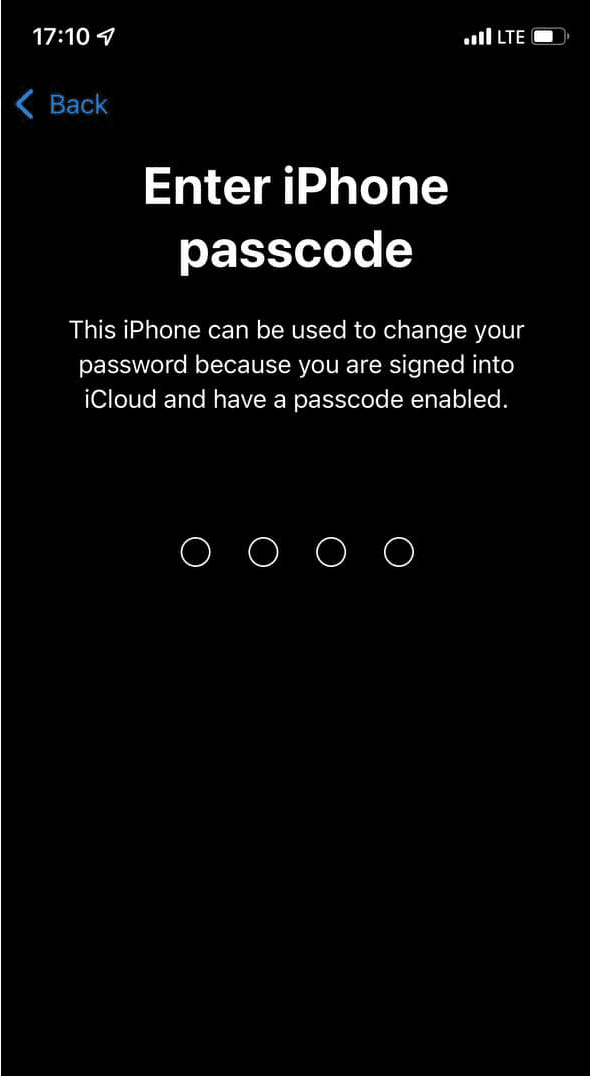
3. In some cases, you may be offered to enter an iPhone passcode to prove your identity.
4. Your next step will be to enter your actual password, a new one, and reaffirm the new password.
Great! It took just a few clicks.
How to reset your Apple ID Password on Mac
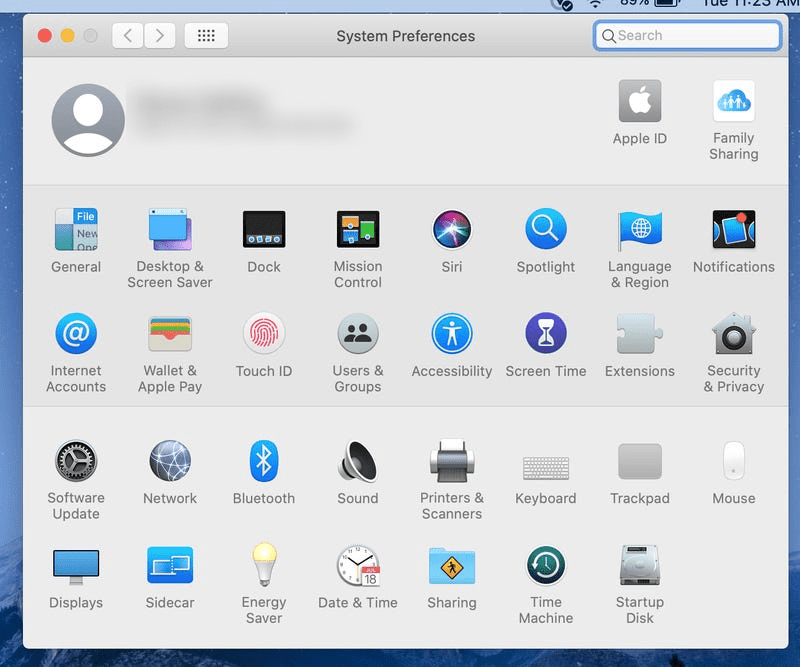
1. Choose Apple menu > System Preferences, then click Apple ID.

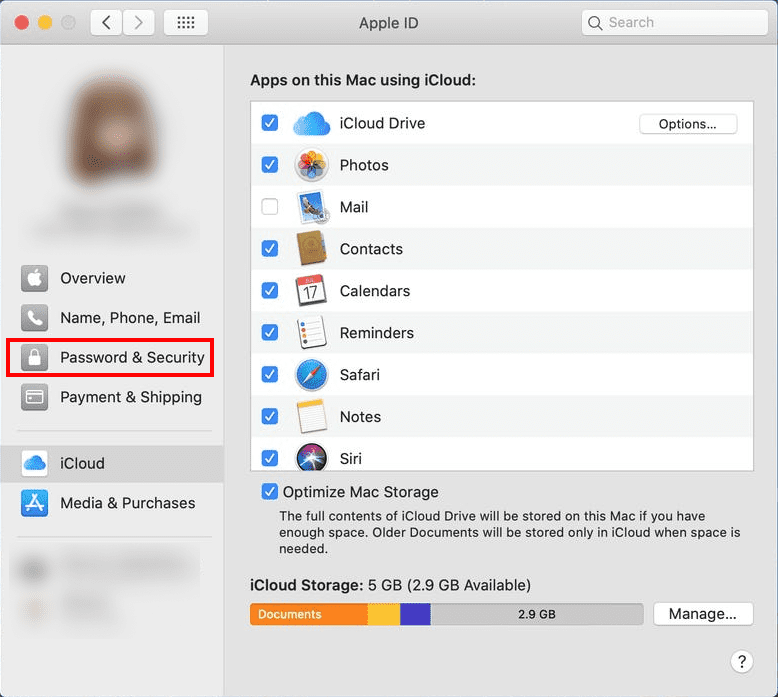
2. Click Password & Security.
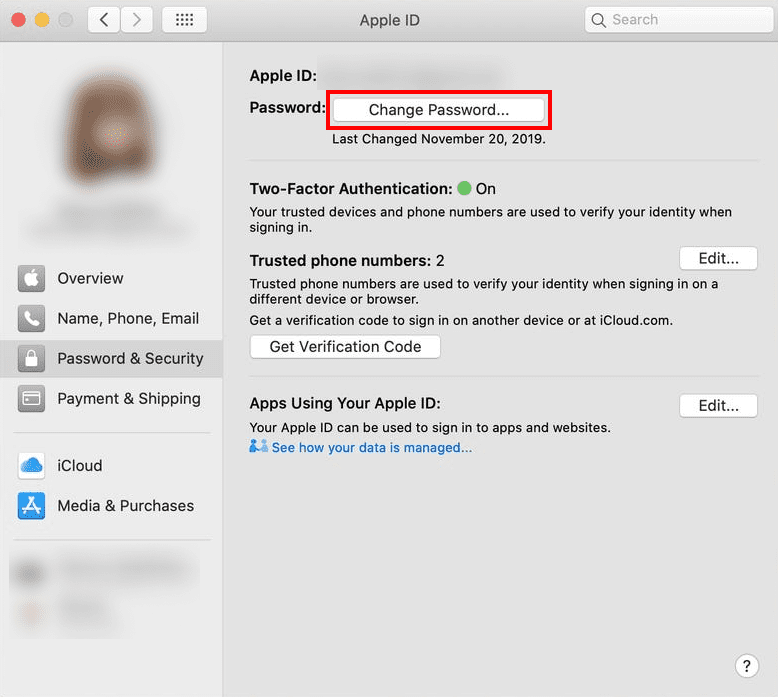
3. Then on the ID screen, click the Change password button.
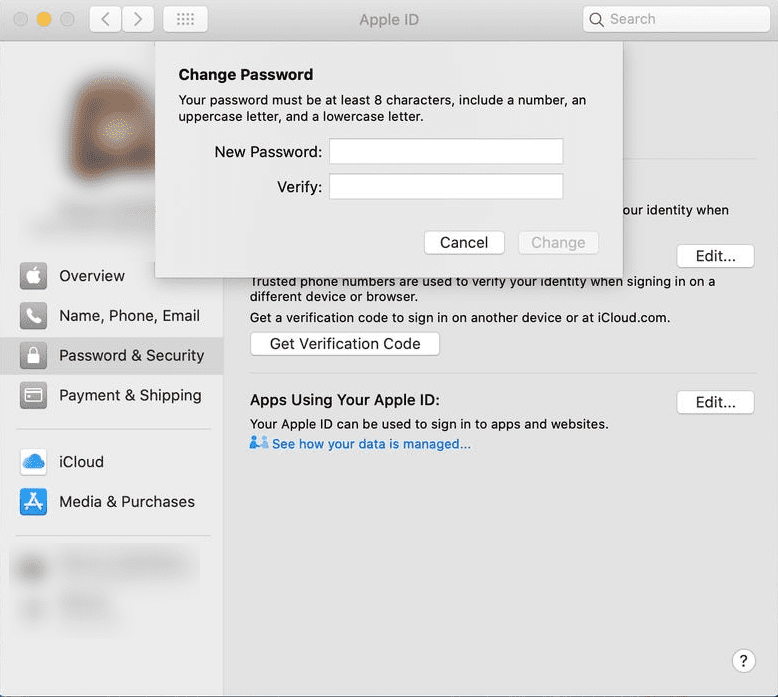
4. After that you should move to the next screen, enter your present password, your renewed one, confirm your New Password, and press the Save button.
Well done! It took two clicks. To be sure that your passwords are strong, check out our comprehensive guide on how to create a strong password.
Get the best security solution to protect your identity!
How to change Apple ID Password on iPhone 12
Without problems, you can change the password on iPhone 12 and any other device, after entering your ID page, which is on a Windows computer or any other device.
1. To change the Apple ID password on iPhone 12 first, go to the Apple ID website and sign in to your Apple ID Account.
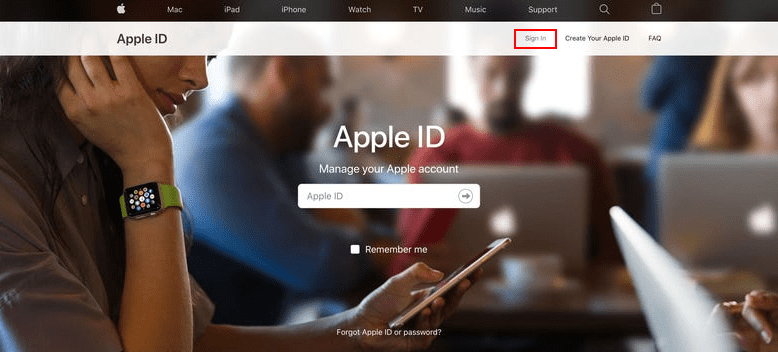
2. Secondly, you may be asked to respond to two safety questions.
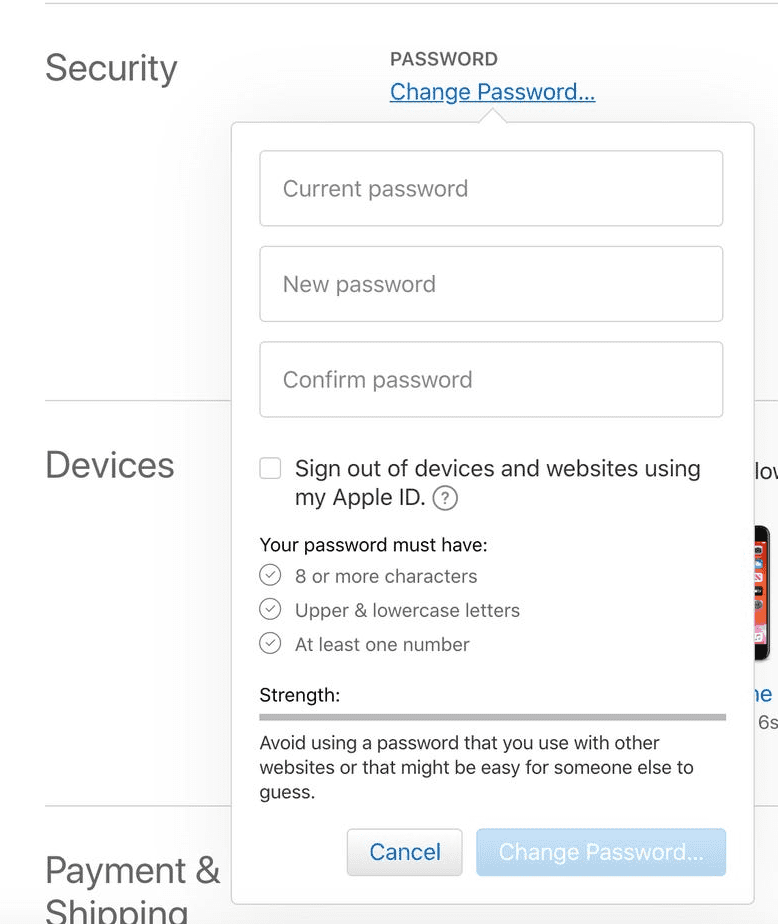
3. Thirdly, on your managed ID screen, go down to the Security section and press the Change Password option.

4. Access your present Password, renew one, prove your renewed one, and press the Change Password button.
One Apple ID is what joins each part of your iPhone. So, it is a principal part of the iPhone 12. Apple will permit you to add multiple IDs on iPhone. But keep in mind that it is restricted to three per iPhone. When you want to sign in to iTunes, buy an App, or buy an iBook, without an Apple ID you will not manage to go further.
What occurs when you change the Apple ID password on iPhone 12, iPhone 13, iPhone XS, or iPhone XS Max?
When you change the ID password on iPhone 12 and iPhone 13, some files such as Photos, Contacts, Calendar reminders, and some others will stay unchanged. But the iBooks, podcasts, and subscriptions, which are associated with your old ID can inflict problems if you decide to update them.
What to do if your Update Apple ID Settings do not work
Sometimes you may have a problem with how to change the password on iPhone 12 or your new iPhone 13, which are stuck with the ‘Update ID Settings’. Or maybe your iOS 15 stops when you press Continue, and type your ID password? Your device fails to authenticate, the Settings and your screen become gray?
After you finish installing settings on your new iPhone 12 or iPhone 13, you will be advised to sign in with your Apple ID in order to use all services which can be associated with your iCloud account.
To Update ID Settings, follow the steps:
- In the beginning, press Continue. Then, you will be offered to provide your ID Password. Print it and press Sign In.
- After doing this, your Apple ID Suggestions screen becomes gray and freezes. The Settings app stops responding.
How to Correct Update Apple ID Settings Stop
Enforce Close Settings
Now you have to leave Settings and reopen it to unfreeze it:
- Swipe up for the App Switcher and swipe up again on the Settings card to make it close.
- Then you should open Settings again and click on Update ID Settings, obtainable in the appropriate part, under your Apple ID.
- Do the same actions and see if it functions the second time.
Cause the Restart of the iPhone 13
If Settings stop again, do not give up, restart your iPhone 13 again. It will hinder you from signing in to your iCloud account.
You can turn your iPhone 13 OFF and turn it ON again. It is the easiest way to restart your device again.
You’ll understand that you fixed the Update Apple ID Settings issue when you try again after the restart and suggested entering iPhone 13 Passcode after the ID Password step. Pint it and finish the authentication.
Enjoy your online activity with Passwarden
Do not waste your time. Set it up and use it.