Чи було це корисно?
Так | Нічого не знайденоНа жаль, вміст цієї сторінки на даний момент недоступний обраною мовою.
How to Convert Data into a JSON File and Import It Into Passwarden
Data transfer and password import with no instruction can be a challenge. This manual will help to convert data from various sources into a JSON file format and import it into Passwarden.
We have developed an external utility app to convert any type of data from the following browsers and extensions into a JSON format supported by Passwarden: Chrome, Firefox, LastPass, 1Password, Dashlane, and Enpass.
- How to convert and export data in JSON
- How to import converted JSON File into Passwarden
- Frequently Asked Questions about data import in Passwarden
So, let's start!
How to Convert and Export Data in JSON
Note: Conversion of a password archive downloaded from Firefox is given as an example.
Our external utility app is developed in the form of a command-line interface (CLI). You can get it here. After installation, managing the utility is performed by the psw-import-cli command passing additional parameters inside:
- -r, --resource - type import (options: "Chrome", "Firefox", "LastPass", "1Password", "Dashlane ", "Enpass")
- -i, --import - input file path
- -o, --output - output file name
- -h, --help - show command help
Important: The External Utility App does not accept spaces in the names of the files it operates on. That is, the name of the file that needs to be opened with the utility must not contain spaces, since the utility will not "see" such a file.
To convert the file into a readable format for Passwarden:
- Open the CLI external utility app.
- Type psw-import-cli -r Firefox -i ../Firefox.csv -o ../outputFirefoxFile. In this line, we turn to the utility first. Then we pass the file type to input and location and file name where you want to save the result.
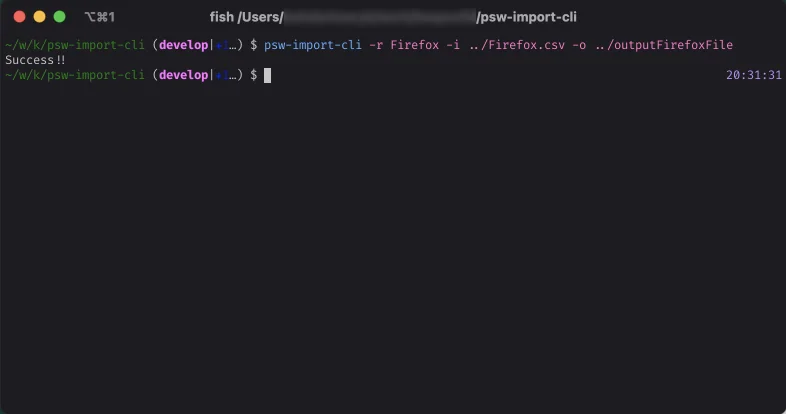
3. Run the command with the Enter button. Success! You have successfully converted the Firefox archive into a JSON file that can be uploaded via the Passwarden web application.
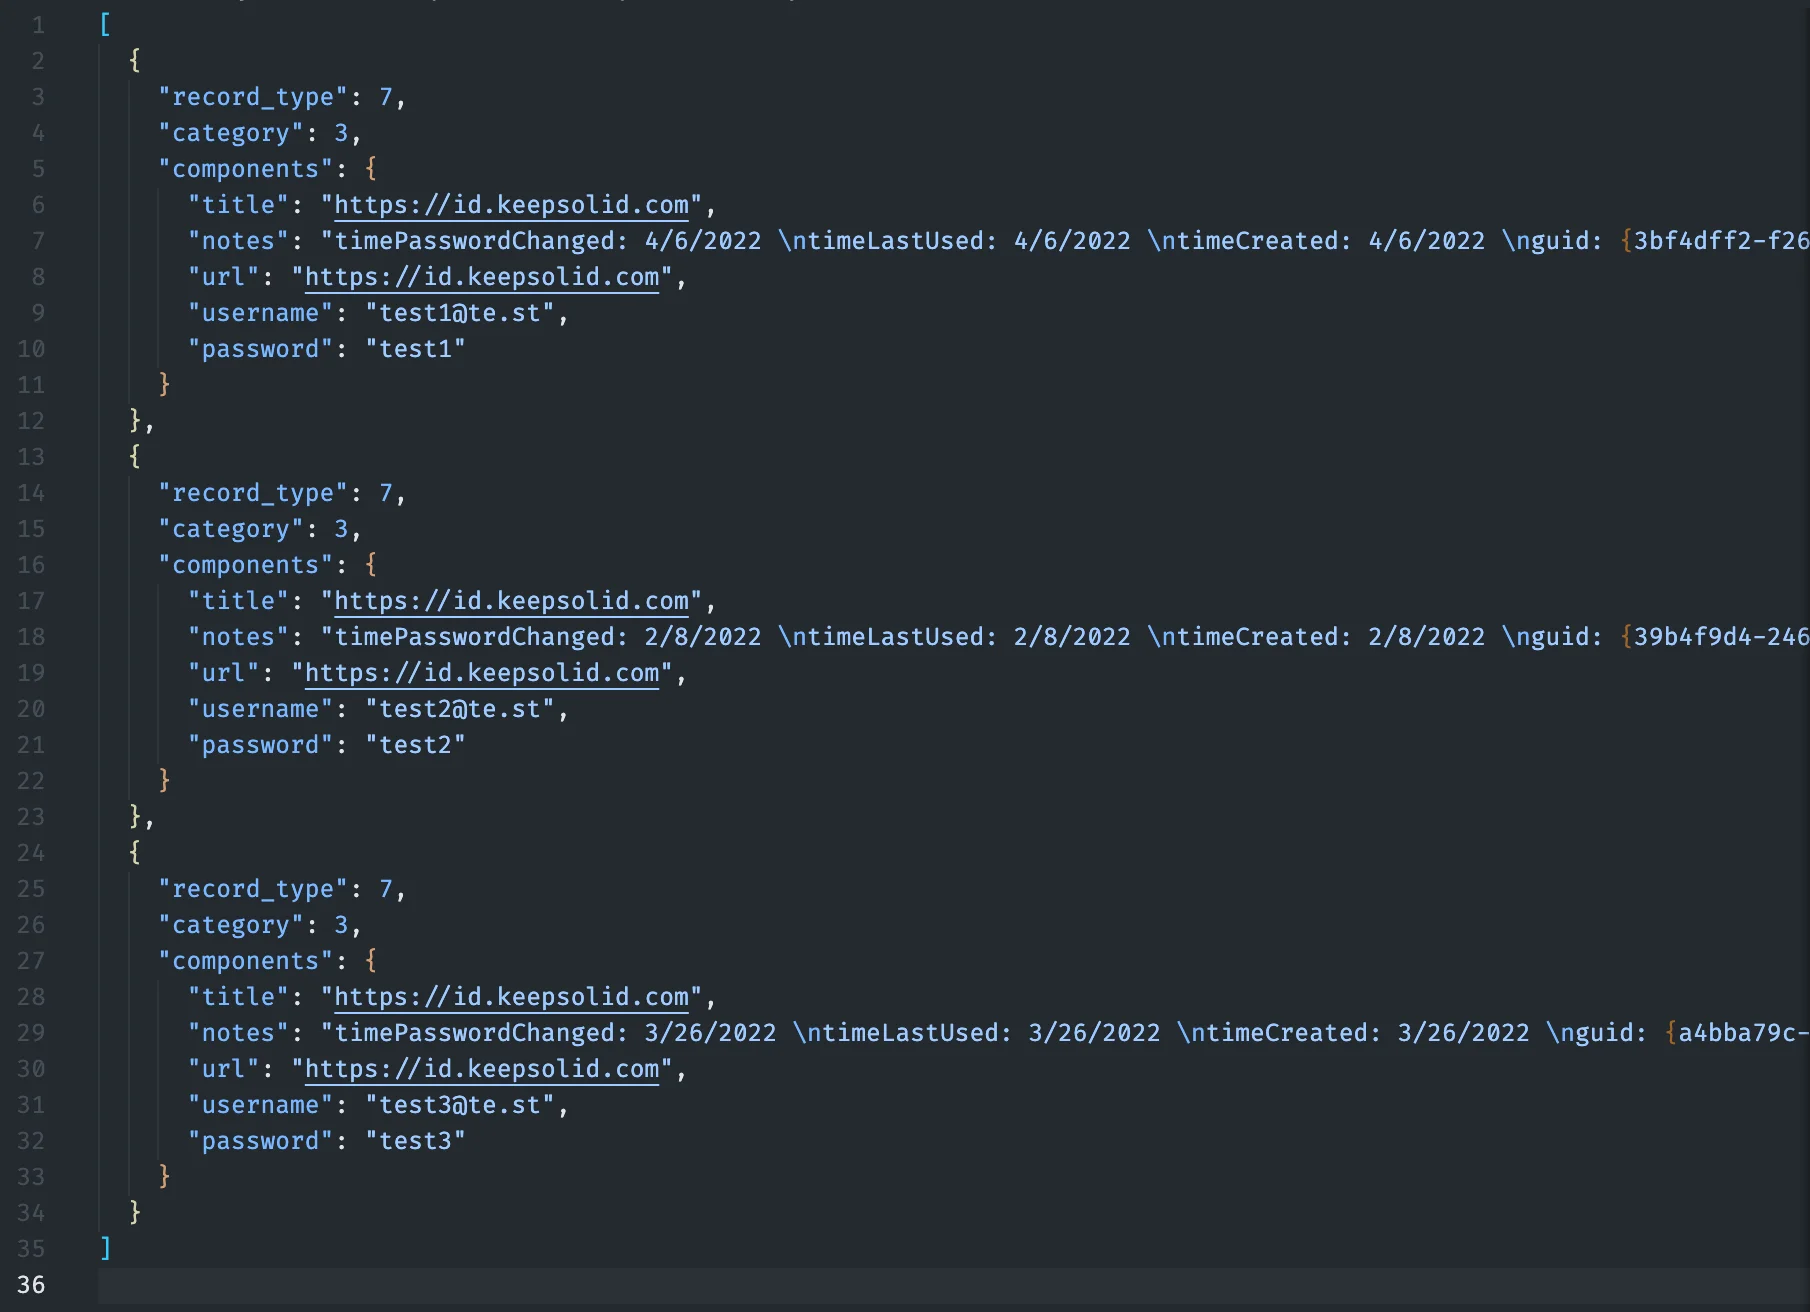
How to Add Custom Import File Type
Note: Conversion of a password archive downloaded from conditional Firefox v.2 is given as an example.
The logic of converting one format to another can be compared to a dictionary. We indicate what columns in Passwarden format correspond to the columns of the converted format.
For example, if the browser returns a file with passwords in the format: username_v2 - login, password_v2 - user password, url_v2 - site for which the password was saved, then patching our import utility for such a browser will look like this:
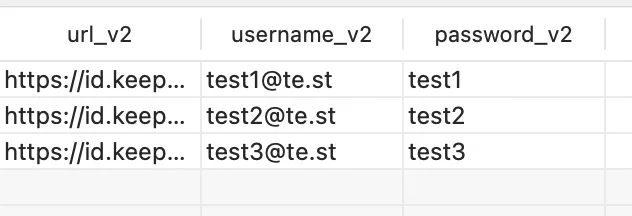
In this case, you need to:
1. Open the CLI project in any convenient code editor (for example VS Code).
2. Go to src/some_libs/schemas folder and copy the firefox_schema.json file to firefox_schema_v2.json
3. Find matching lines for columns and make changes. Replace:
- Line 29 - "username_v2",
- Line 32 - "hostname_v2",
- Line 35 - "url_v2",
- Line 38 - "password_v2".
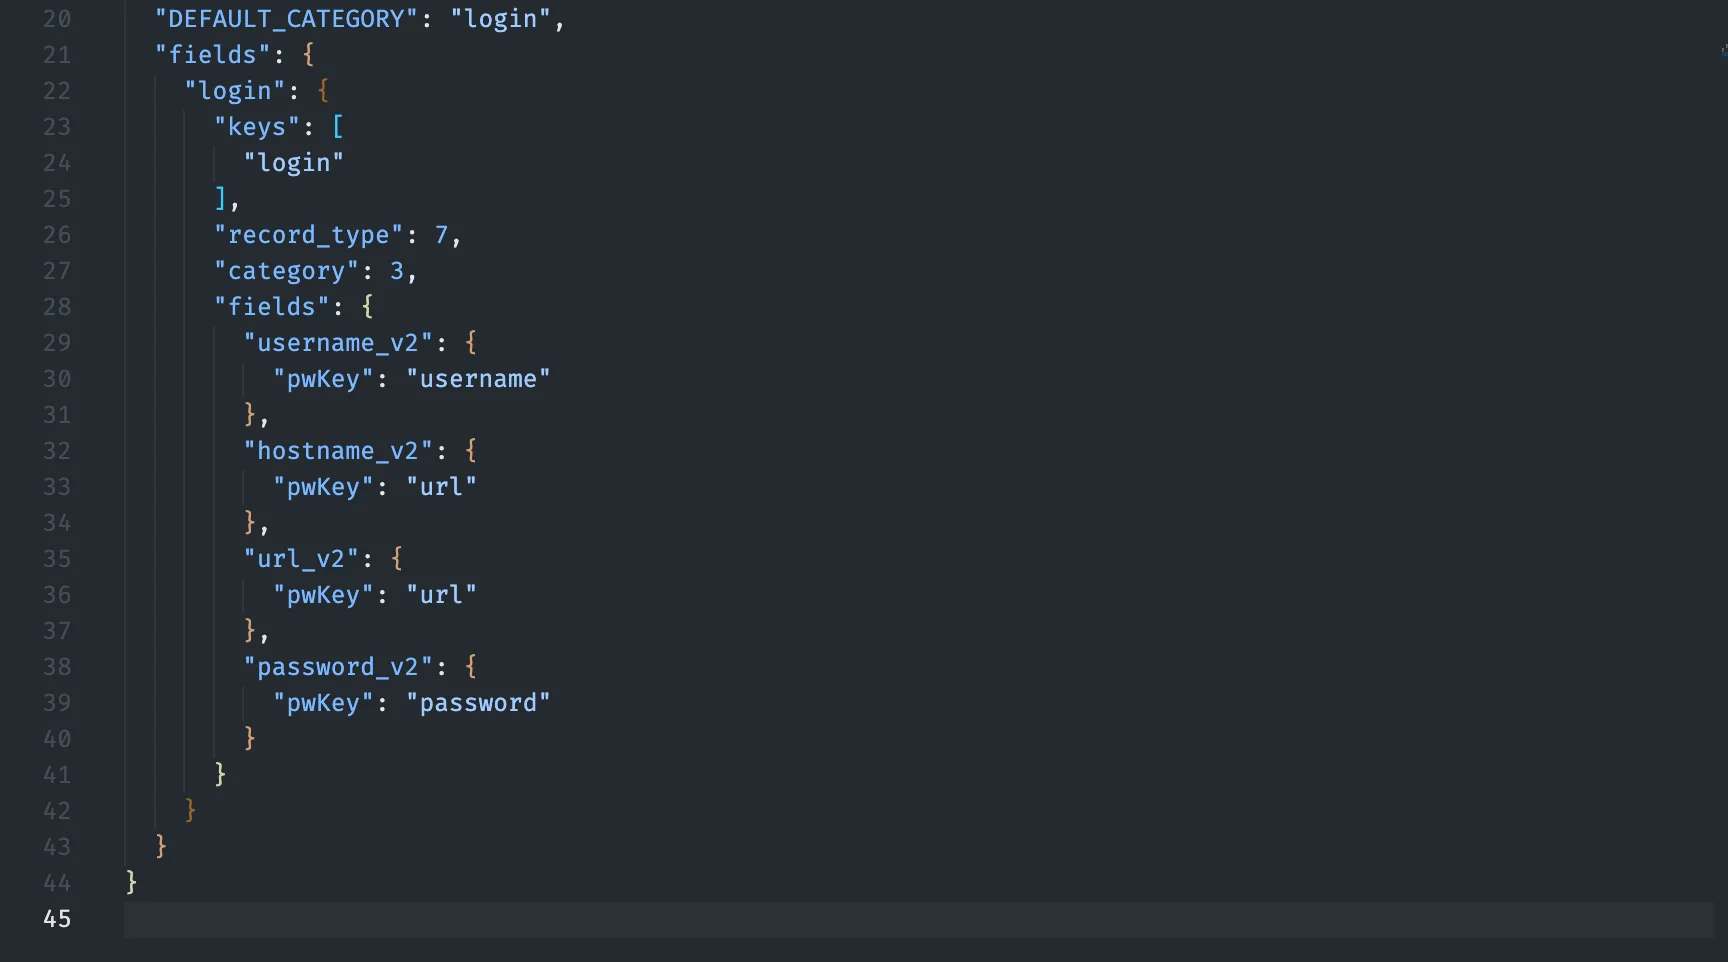
4. After creating the dictionary file, you need to add a new import option to the src/constans.ts and src/some_libs/src/index.ts files, respectively:


5. Now you need to rebuild the project. For this, you need to successively execute the commands:
-
- npm unlink psw-import-cli
- npm run build
- npm link
6. Then, check the work done by running the utility and passing new parameters and a file:

Great! You have successfully added the custom import file type. Now you can convert it to JSON for further import to Passwarden.
How to Import Converted JSON File into Passwarden
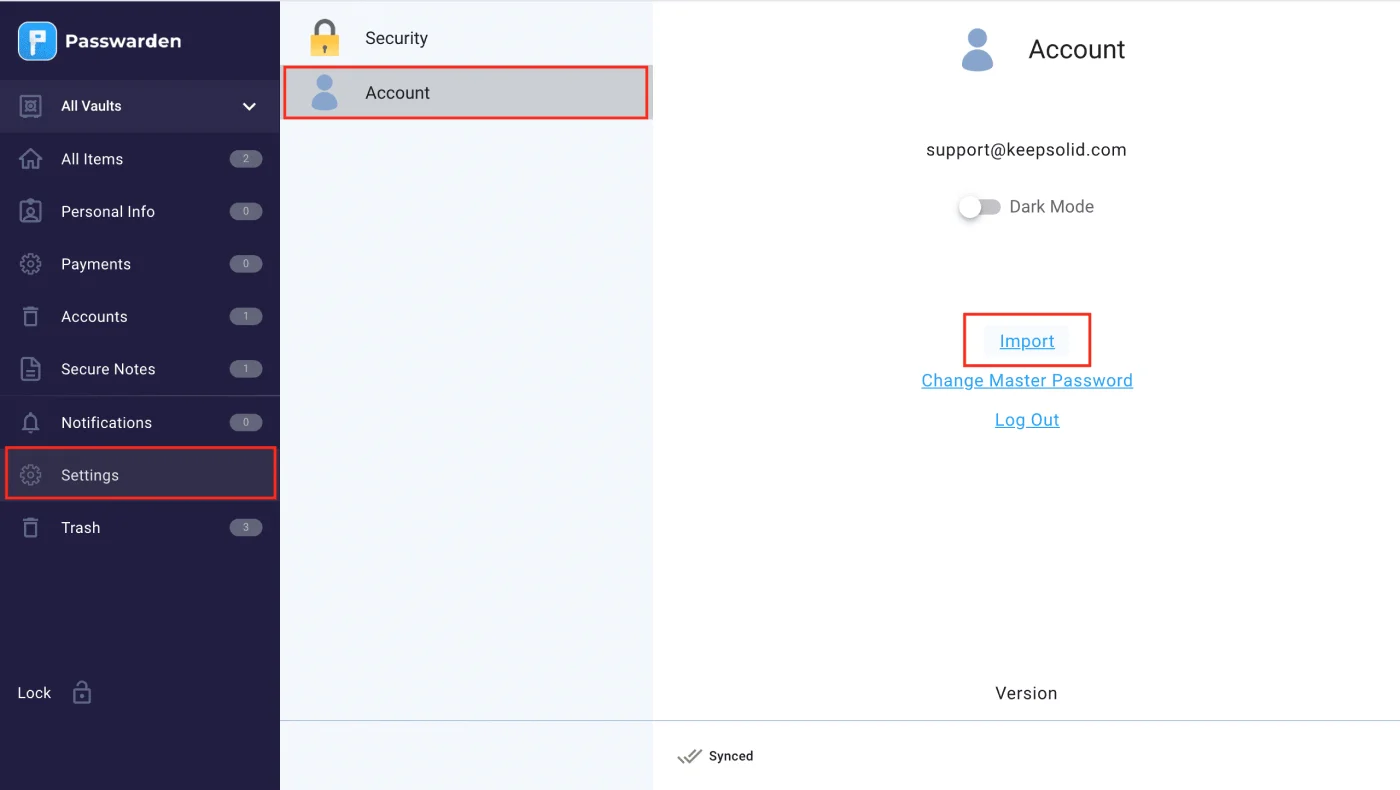
1. Open the Passwarden web application and go to Settings > Account > Import.
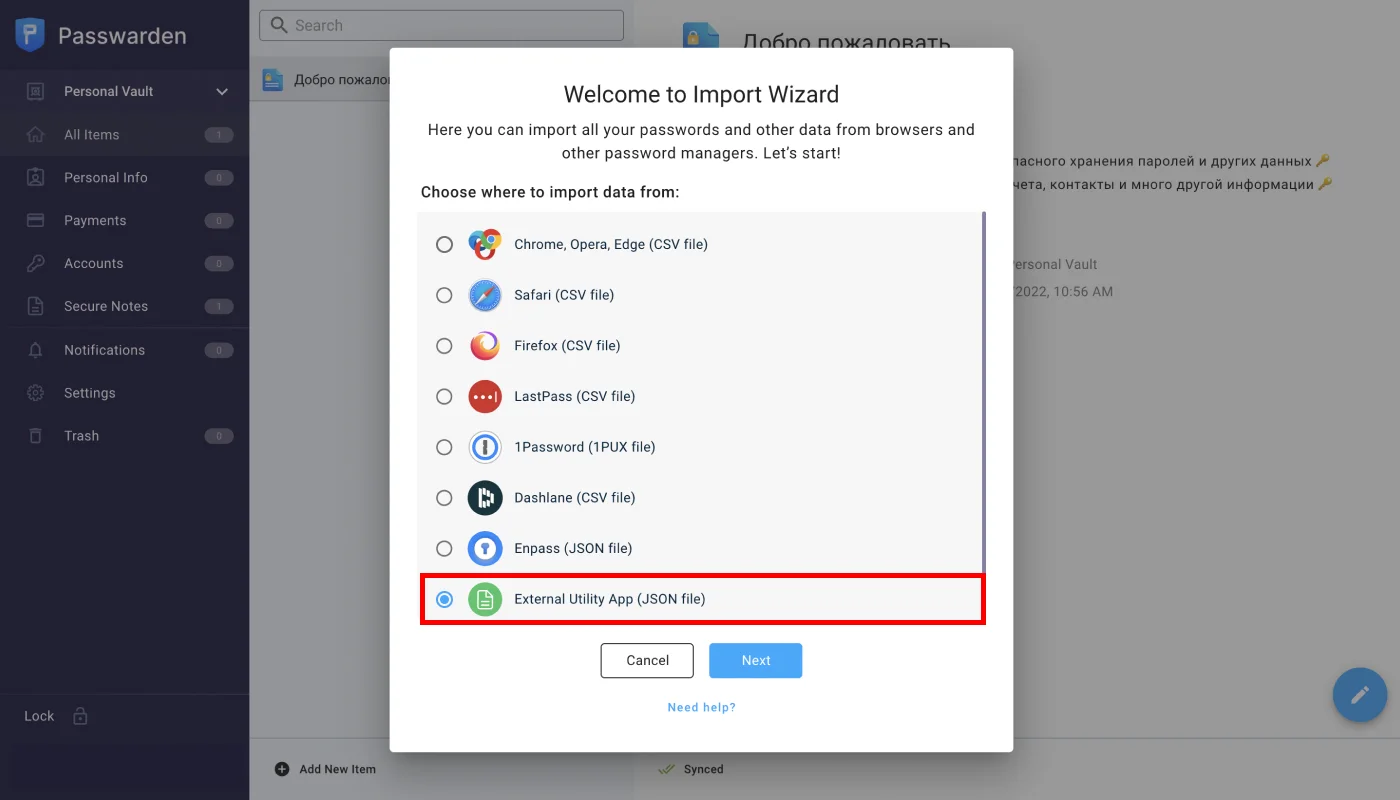
2. Choose the External Utility App (JSON file) option and click Next.
3. Select the Vault you want to import your passwords and upload the previously exported file. Click Import.
Great! You successfully imported all your passwords to Passwarden.
Note: After you’ve imported your information into Passwarden, make sure to delete the .json file from your device.
Frequently Asked Questions About Data Import in Passwarden
How can I transfer my passwords from other apps into Passwarden?
What kind of data can I transfer into Passwarden?
Where can I have assistance if I face some issues?
Convert any data into JSON and import it to Passwarden with no-hassle!
Enjoy a reliable and user-friendly application to generate, store, and encrypt your sensitive data.
Note: Passwarden is available as a part of the MonoDefense security bundle.