很不幸,此页面的内容目前无法使用所选语言。
How to manage vaults in Passwarden
This guide provides you with step-by-step instructions on how to create, edit, remove, and even restore vaults.
To be on the same page, a vault is a secure storage for all your passwords, credit card details, important notes, and other items.
Note: You already have a Personal Vault by default. This vault contains items available to you only. You can start adding your items into this vault or, if you wish, you can add other vaults to effectively organize your data.
How to create a new vault?
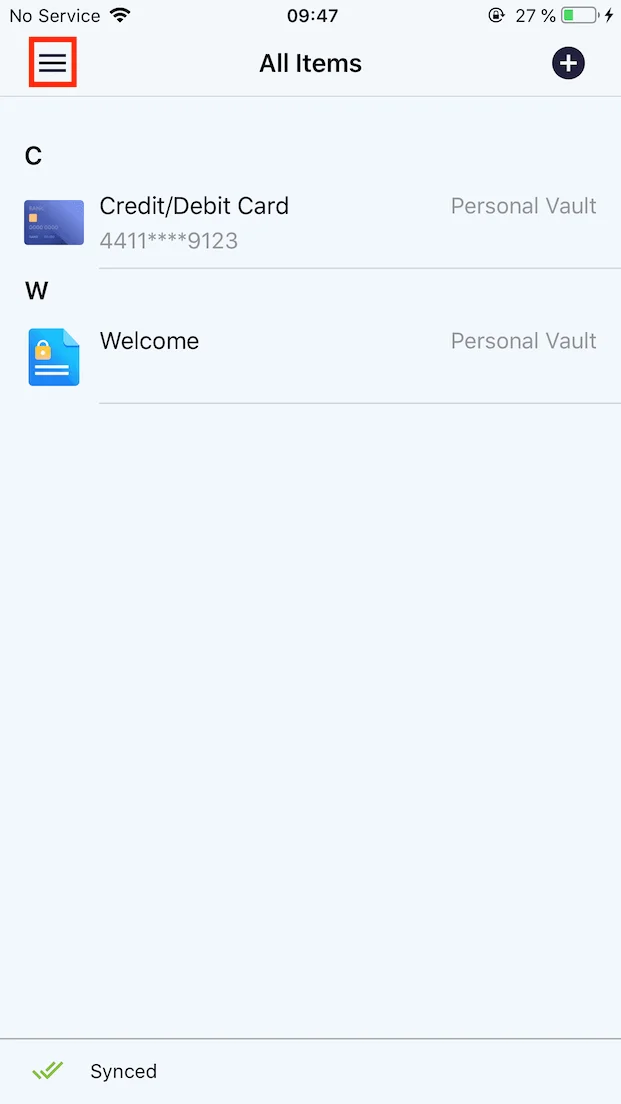
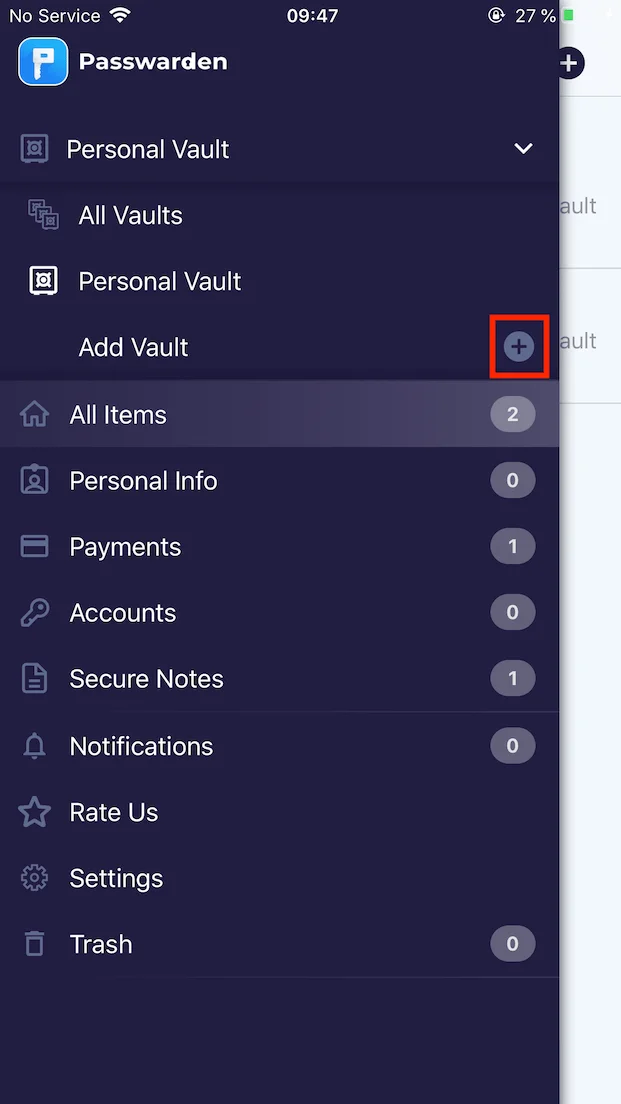
1. Navigate to the sidebar menu and tap Add Vault.
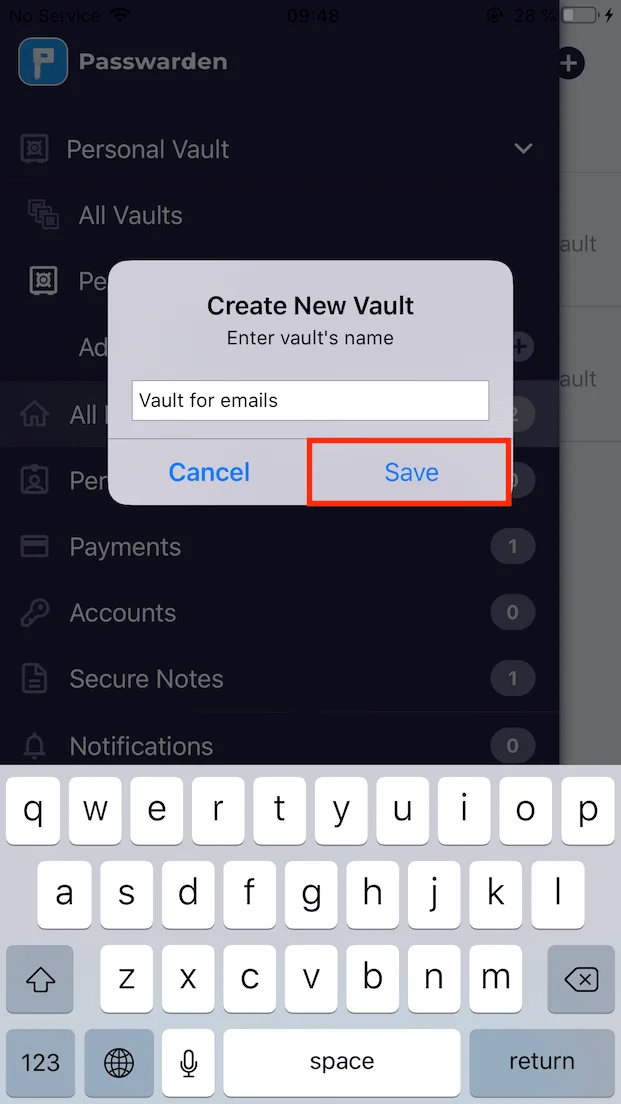
2. Enter your new vault’s name and click Save.
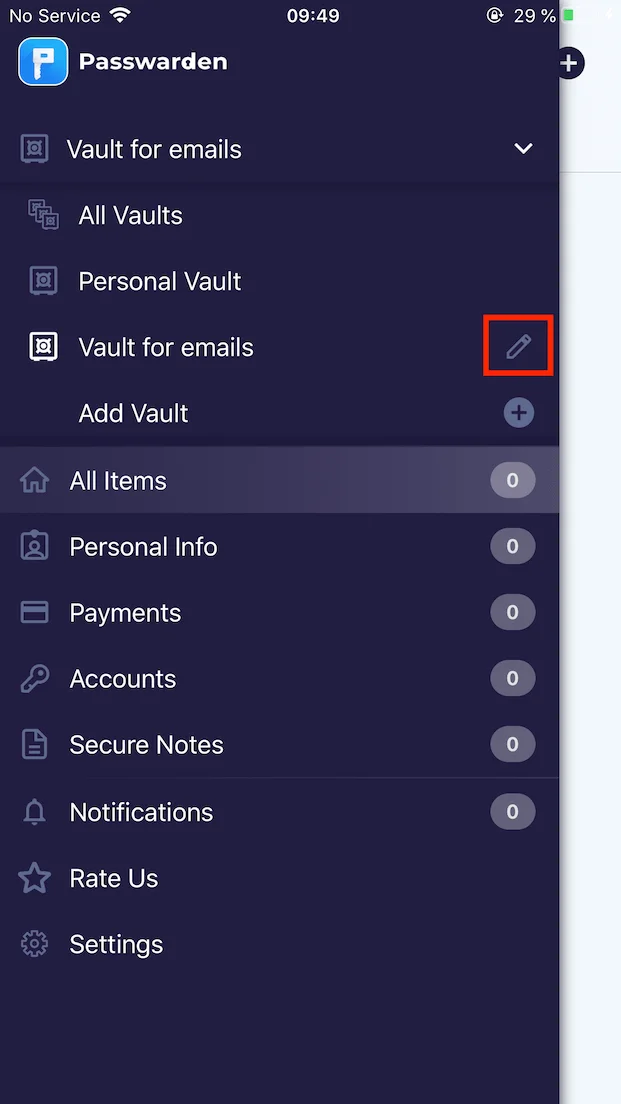
3. The new vault appears on the sidebar in the All Vaults section.
How to rename your vault?
1. Tap the

2. Print the new name of this vault in the Vault’s Name field and tap Save.
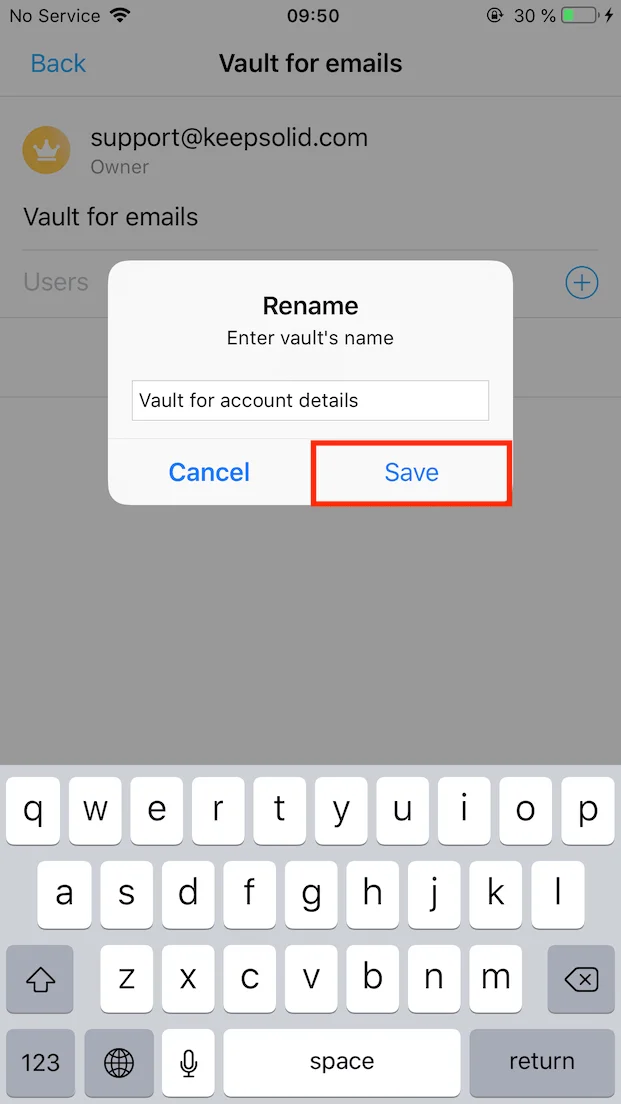
Also, in this tab, you can share access to the vault with other users by sending them an invite. To do that, check out our detailed instructions on how to share vaults with others.
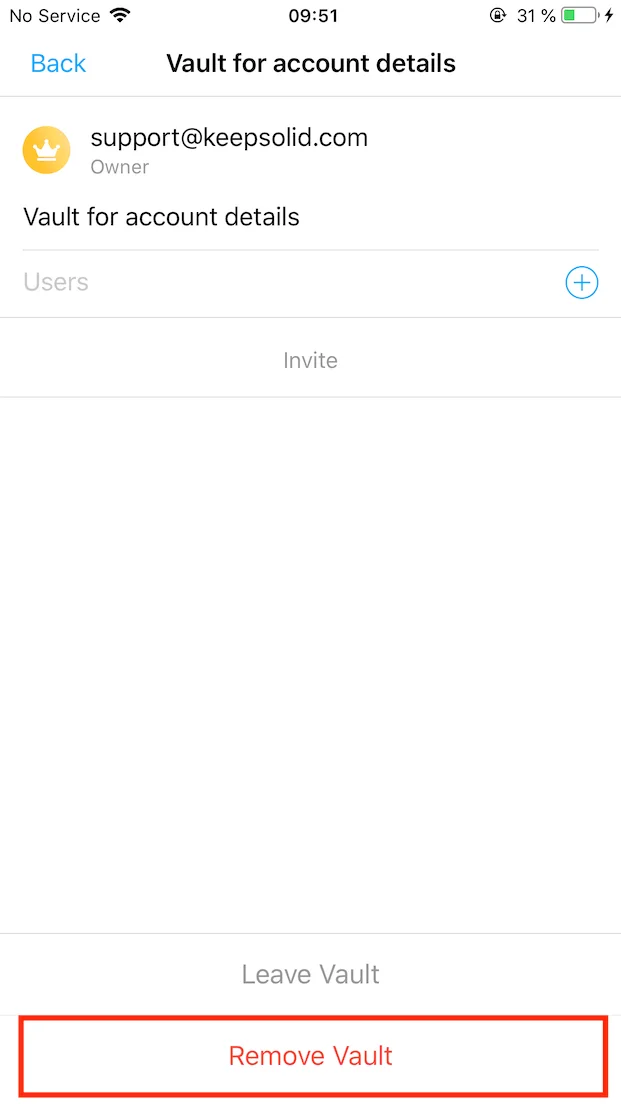
How to delete a vault?
1. Tap the

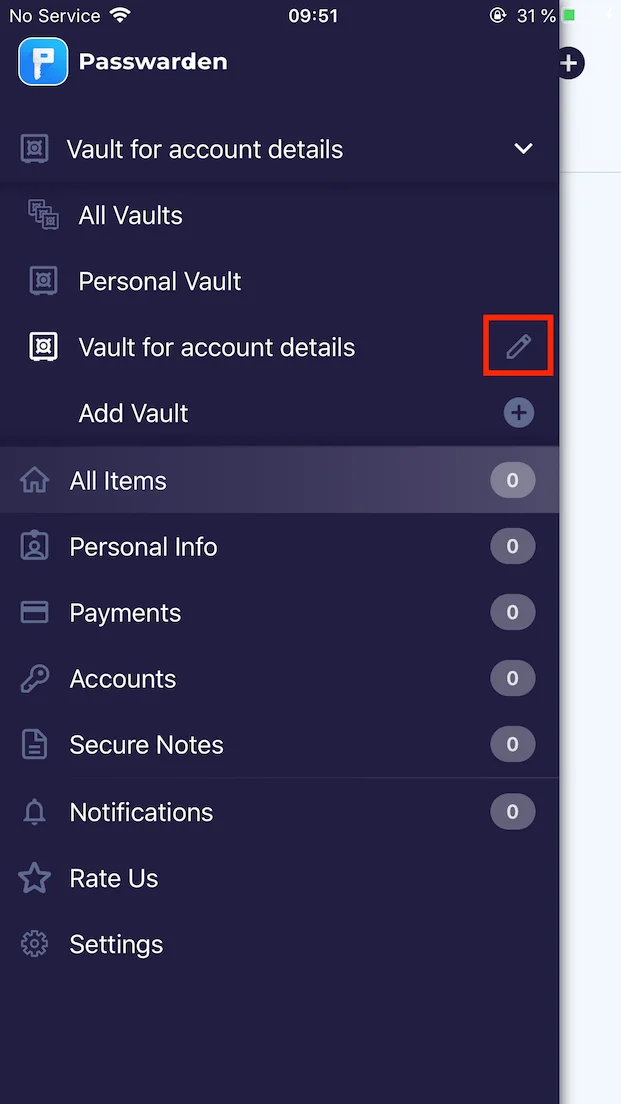
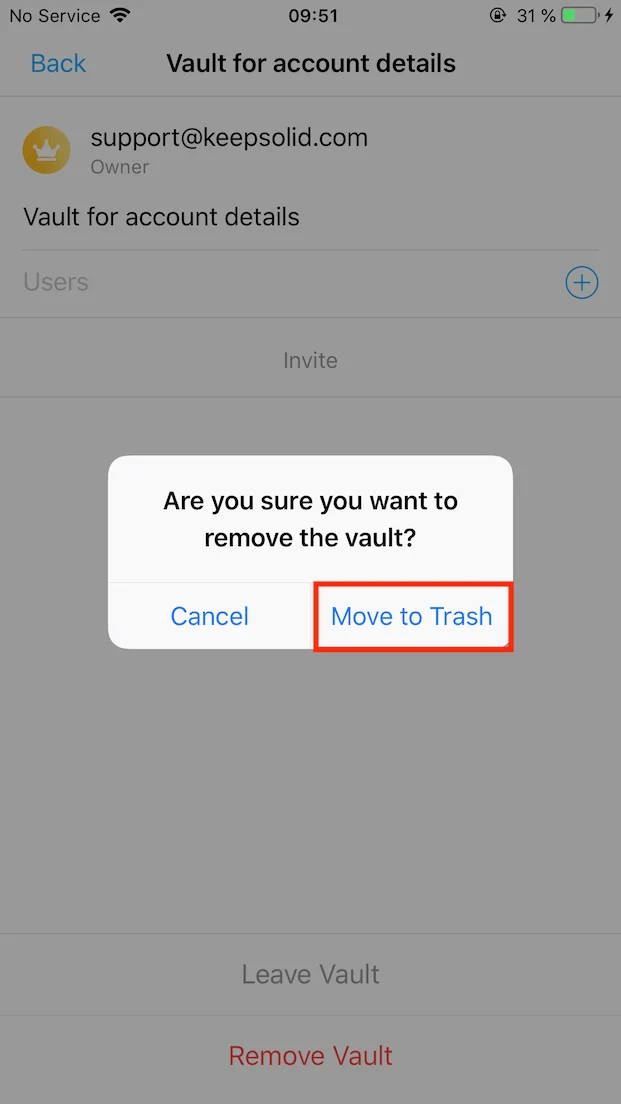
2. Tap the Remove Vault button at the bottom of the screen and confirm your action.
Note: This vault would be moved to the Trash and would be stored there for the next 90 days. To completely remove this vault, go to the Trash, select it, tap Delete Permanently, and confirm your action.
How to restore a deleted vault?
1. Navigate the Trash tab and select the vault you want to restore.
Note: You can’t restore only vaults that were deleted earlier than 90 days before today.
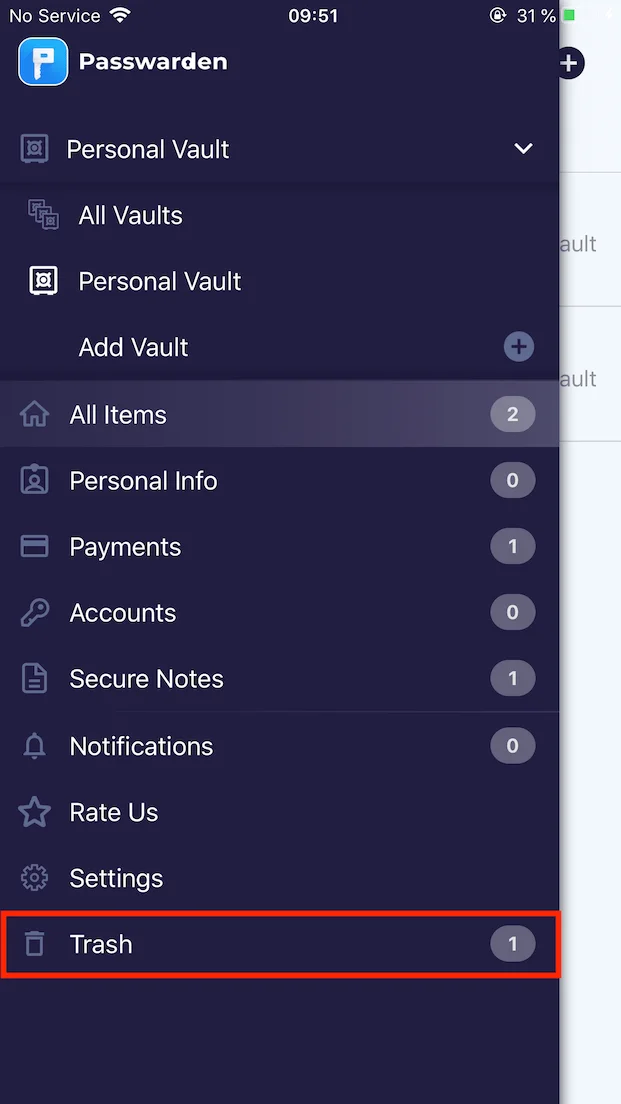
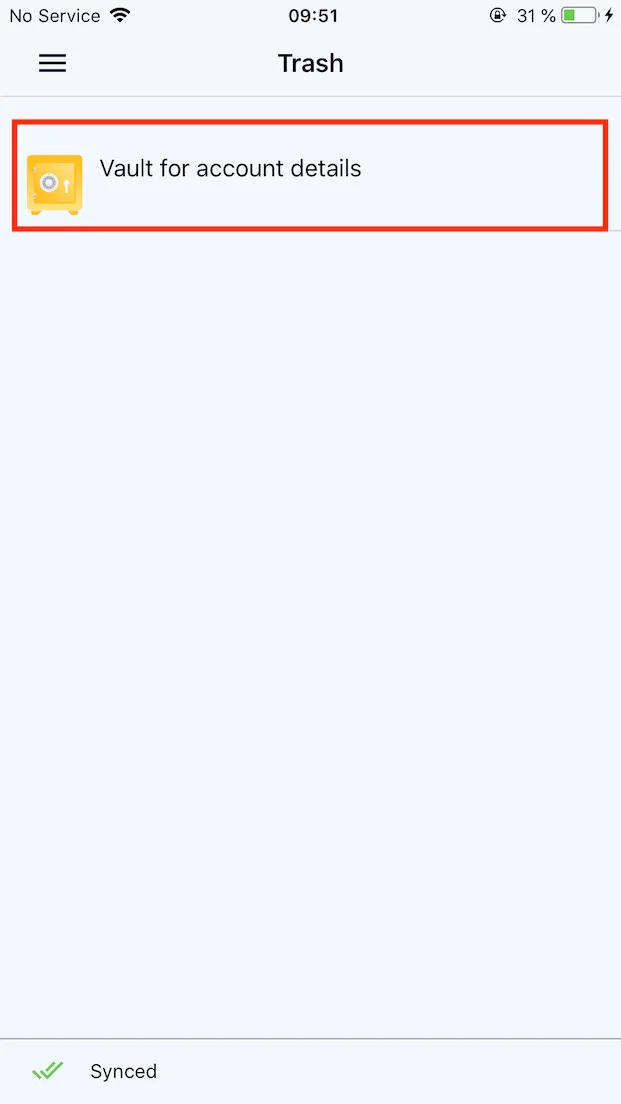
2. Tap Restore at the bottom of the screen.
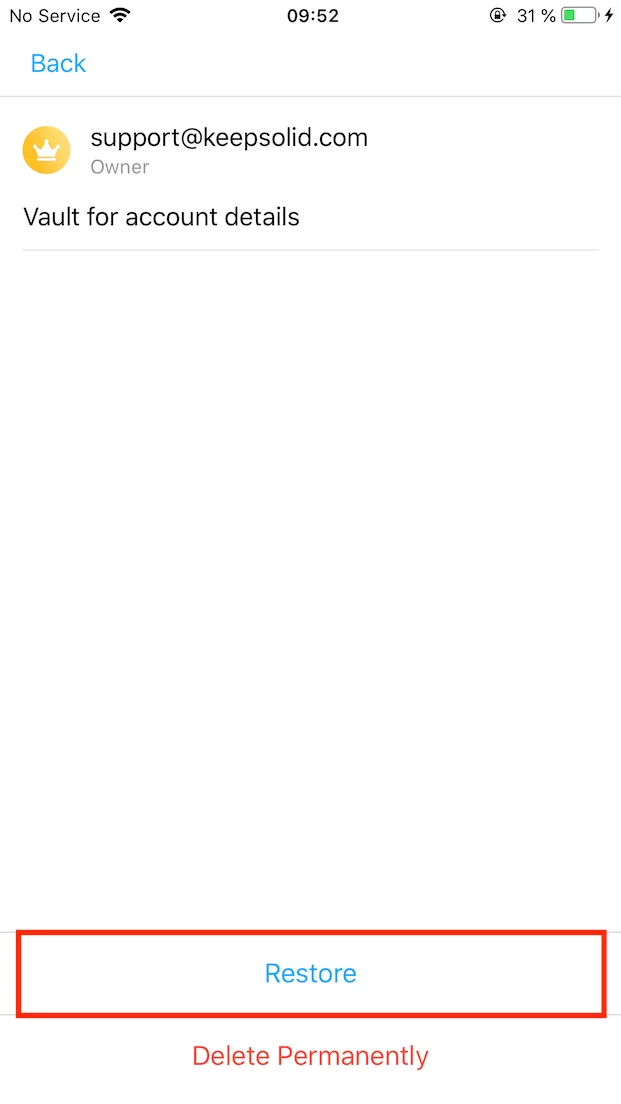
That’s, the vault is successfully restored! You can find this vault on the sidebar.
If you still have any questions on how to work with vaults in Passwarden, don’t hesitate to contact our customer support via support@keepsolid.com. We’ll gladly assist you 24/7/365!
It’s high time to get Passwarden!
Save your passwords, credit card details, important notes, and other items in the secure Passwarden storage and be sure your data is reliably protected.